Best Time to Visit Iceland for Photography Lovers

Best Time to Visit Iceland for Photography Lovers

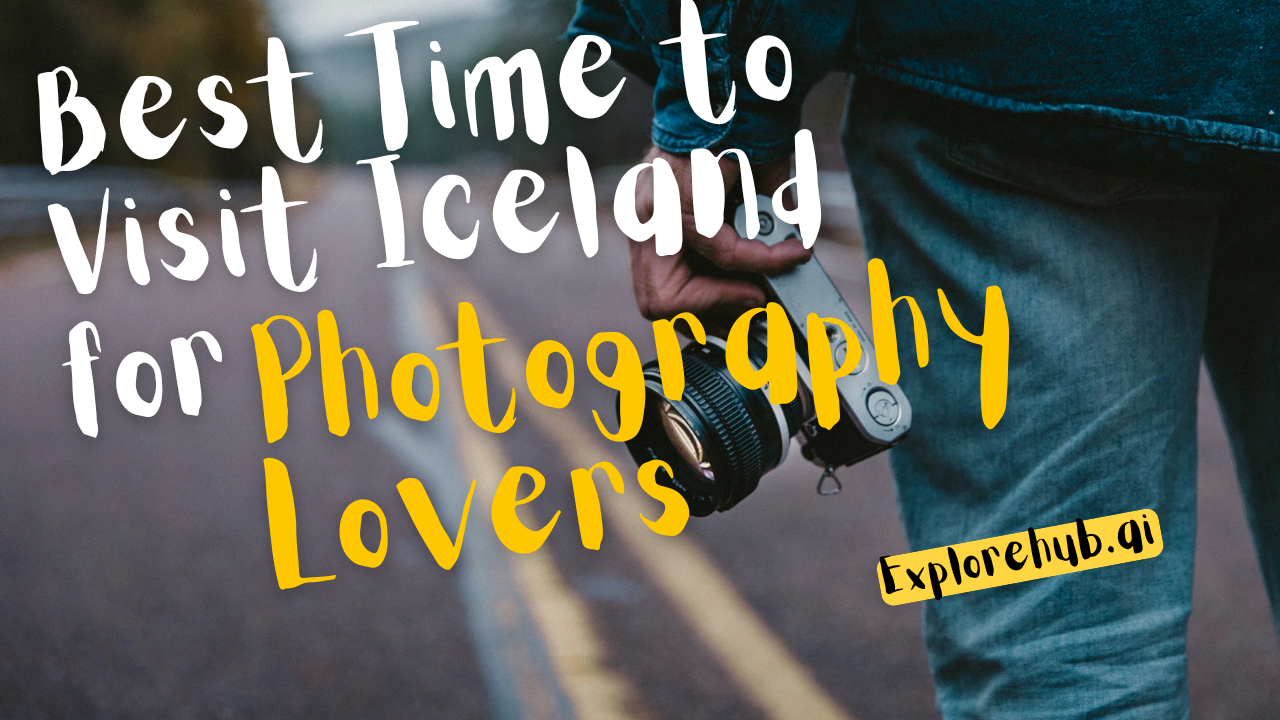
Iceland is a dream destination for photography enthusiasts. From the breathtaking Northern Lights to the stunning waterfalls, glaciers, and rugged landscapes, Iceland offers unparalleled opportunities for capturing nature at its best. However, when is the ideal time to go? The answer depends on what you want to photograph. Let’s dive into Iceland’s seasons and explore the best times for photography lovers to visit.

Understanding Iceland’s Seasons

Winter (December–February)

Winter in Iceland is magical, with snow-covered landscapes and the mesmerizing aurora borealis. However, daylight hours are short, and weather conditions can be extreme.

Spring (March–May)

Spring offers a mix of winter landscapes and blooming greenery, making it a great time for varied photography. It’s also less crowded than summer.

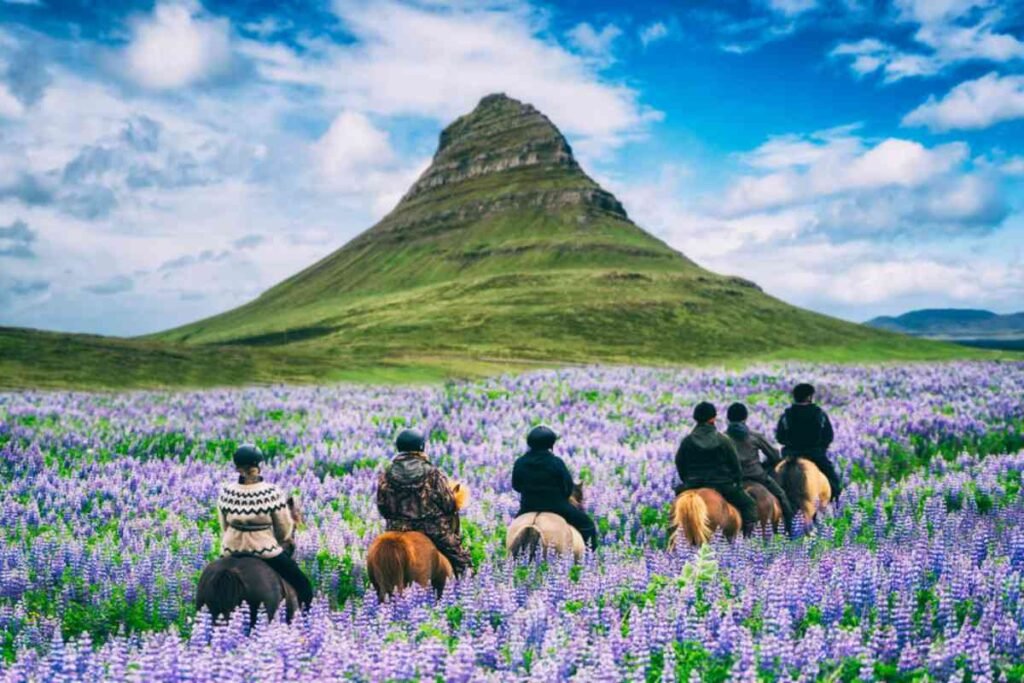
Summer (June–August)

The summer months bring the midnight sun, long golden hours, and lush green landscapes. This is the best season for road trips and wildlife photography.

Fall (September–November)

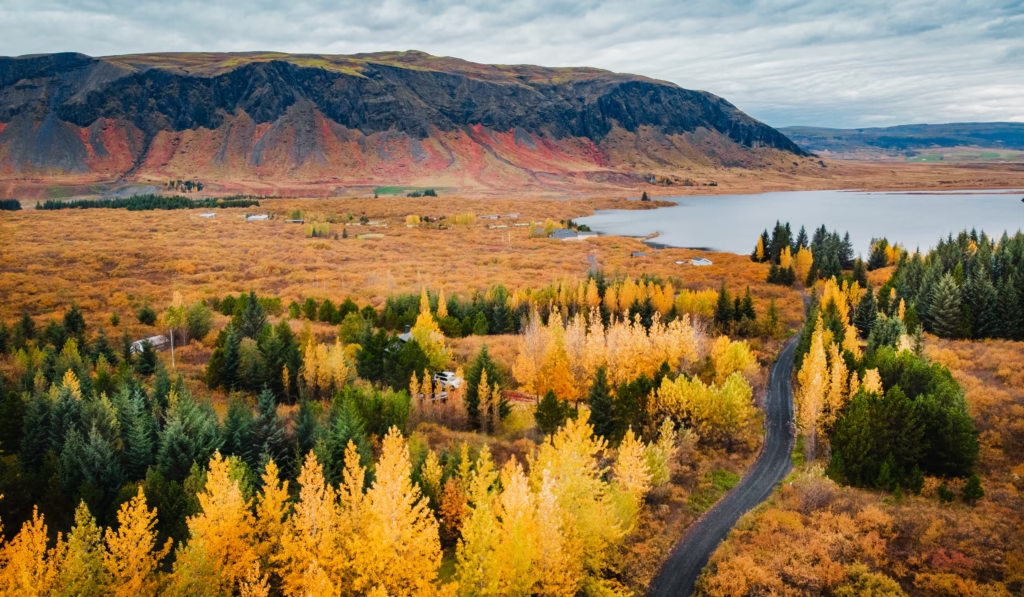
Autumn in Iceland brings stunning fall colors, fewer tourists, and a chance to see the Northern Lights return.

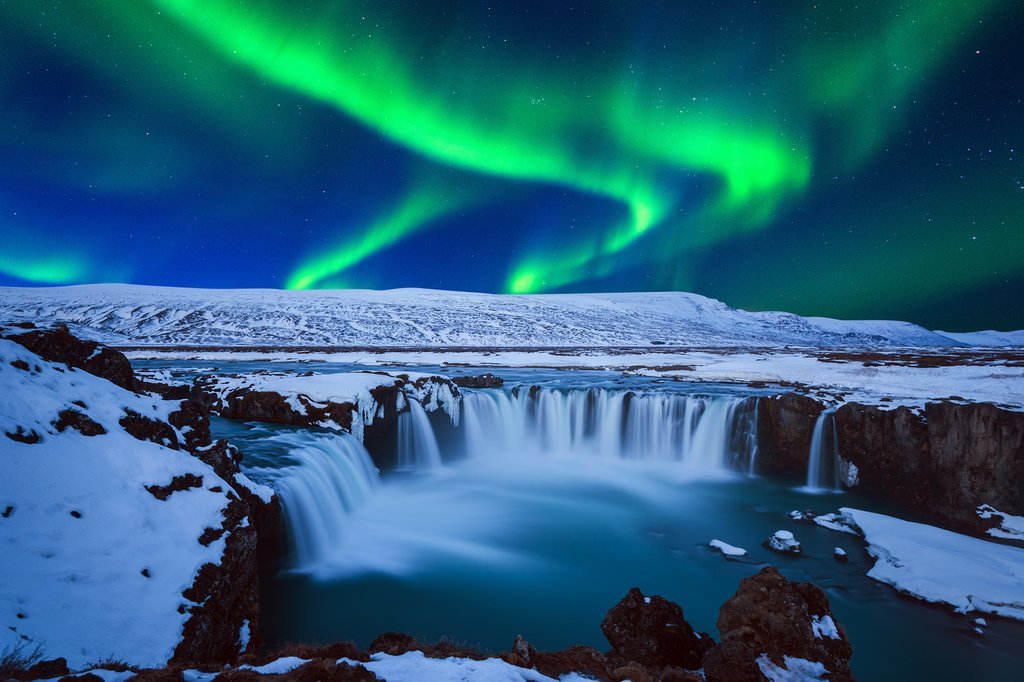
Best Time for Northern Lights Photography

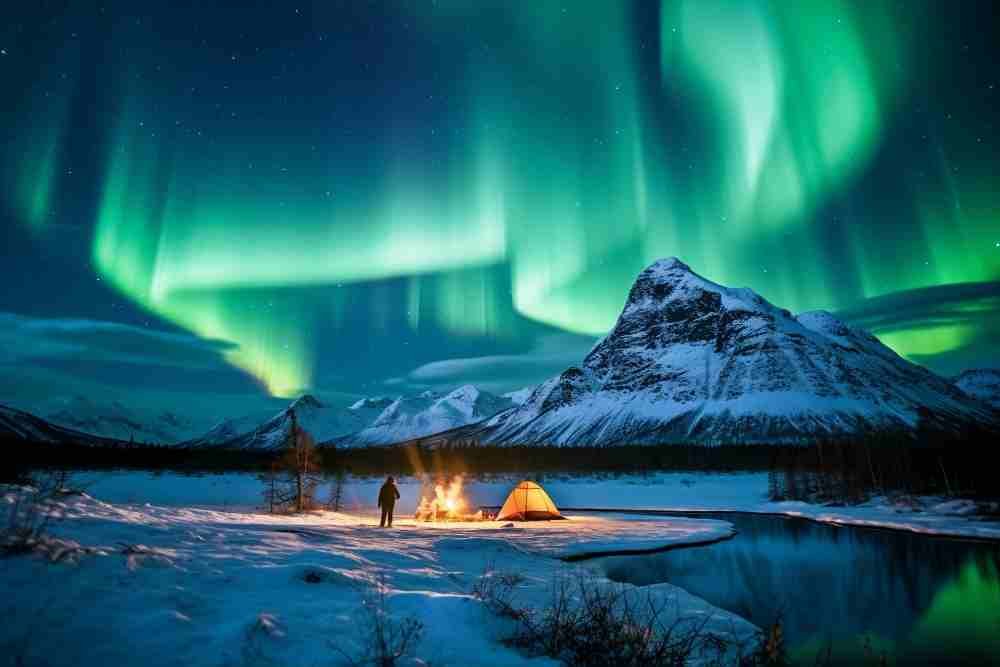
The Northern Lights are best captured between September and April when the nights are darkest. The best locations include Thingvellir National Park, Kirkjufell, and Jokulsarlon Glacier Lagoon. Use a tripod and long exposure settings for the best shots.

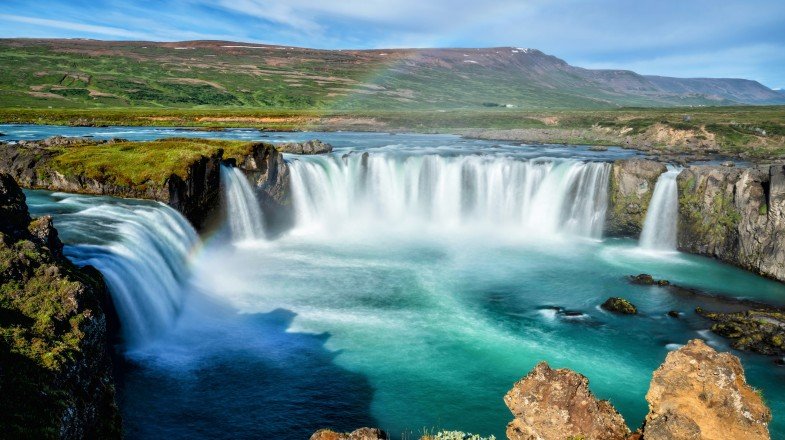
Best Time for Midnight Sun and Golden Hour

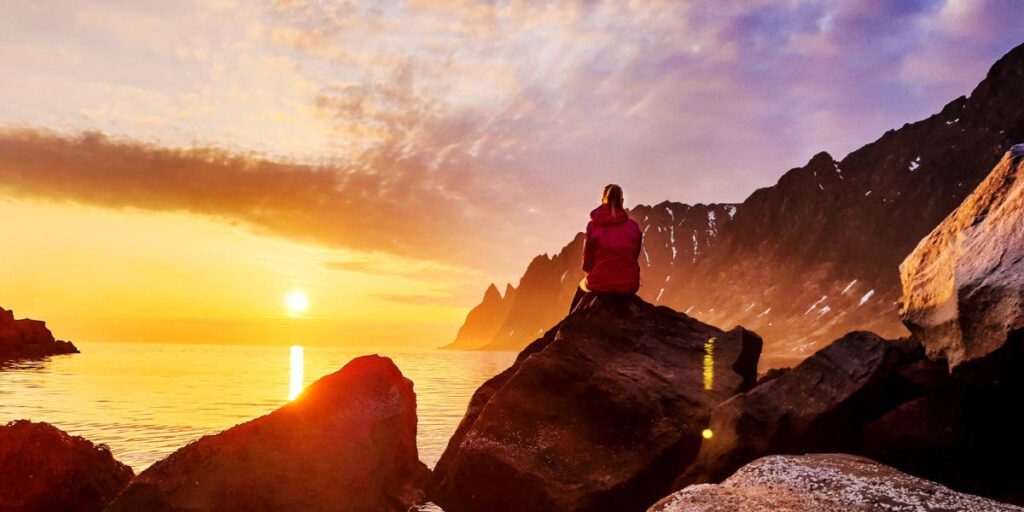
For photographers who love soft golden light, June and July are the best months. The midnight sun provides extended golden hours, creating stunning landscapes. Head to Vik’s black sand beaches, the Westfjords, and Godafoss waterfall for the best compositions.

Best Time for Ice Caves and Glacier Photography

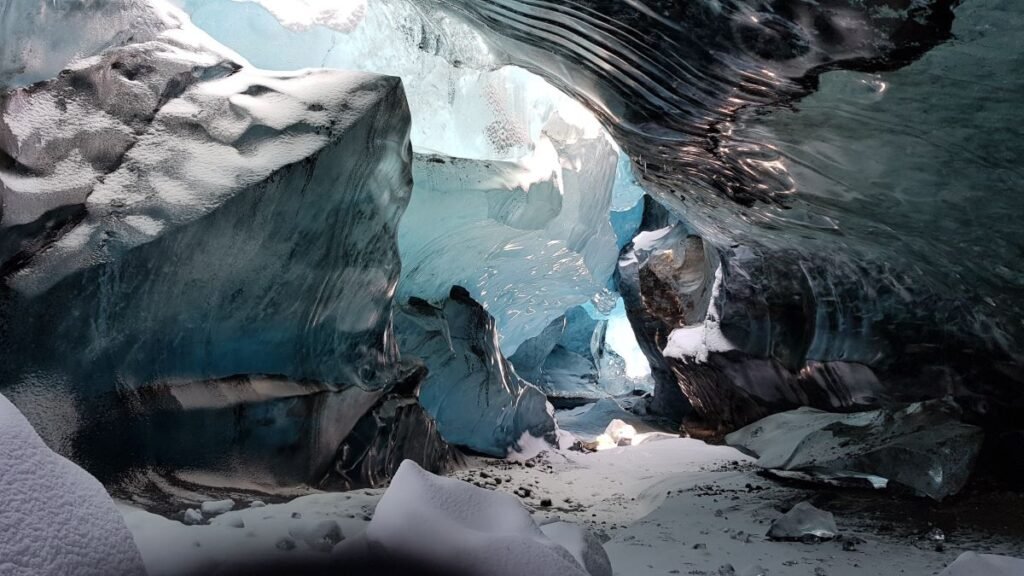
If you want to photograph Iceland’s famous ice caves, visit in winter (November–March). The best caves are found in Vatnajökull Glacier. Always go with a guided tour for safety.

Best Time for Waterfalls and Landscapes

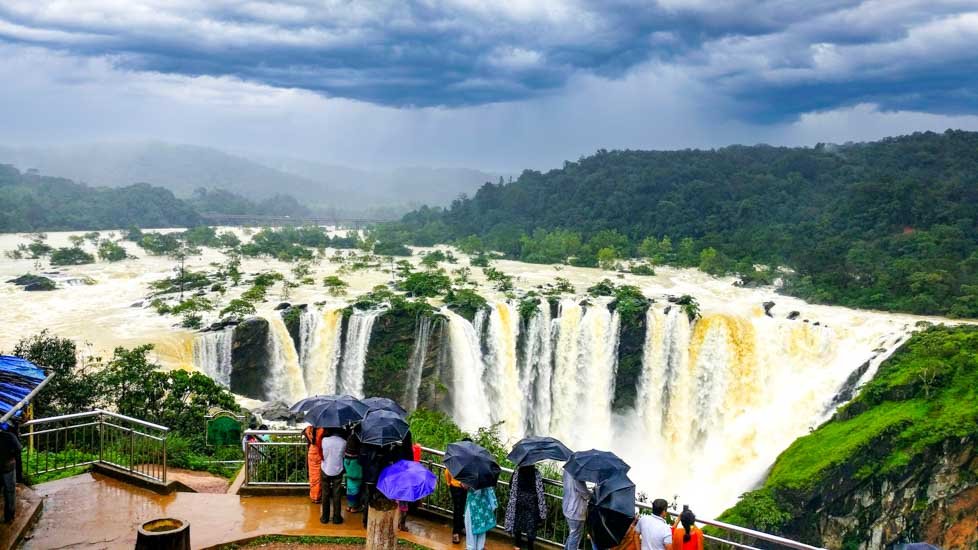
Each season changes the look of Iceland’s waterfalls. Spring and summer are great for lush, flowing waterfalls, while winter turns them into icy wonders. Don’t miss Seljalandsfoss, Skogafoss, and Gullfoss.

Best Time for Wildlife Photography

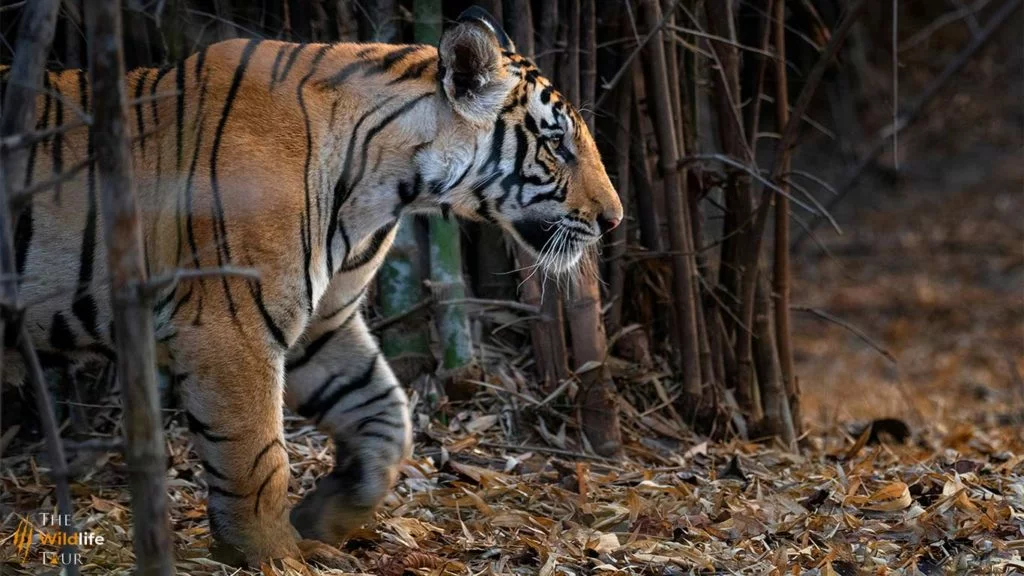
If you love wildlife photography, visit Iceland in summer (May–August) to see puffins, Arctic foxes, and whales. The Westman Islands and Látrabjarg Cliffs are the best spots for puffins.

Best Time for Road Trips and Adventure Photography

For those who love road trips, summer is ideal. The Ring Road, Golden Circle, and Snæfellsnes Peninsula offer endless photography opportunities.

Icelandic Weather and Photography Challenges

Iceland’s weather is unpredictable. Always dress in layers, carry waterproof gear, and check weather apps like Vedur.is before heading out.

Conclusion

No matter when you visit, Iceland offers incredible photography opportunities. Winter is perfect for the Northern Lights and ice caves, while summer provides golden light and wildlife photography. Plan according to your photography goals, and be ready for Iceland’s ever-changing weather.

Frequently Asked Questions

Answer-The best time for aurora borealis photography in Iceland spans from late September to early April, with peak viewing conditions generally occurring between October and March. During these months, the nights are longer and darker, providing optimal opportunities to capture the stunning displays of the northern lights.

In terms of specific timing, the hours between 10 p.m. and 2 a.m. are often considered the most favorable for aurora photography. This is when the auroras are typically at their most active, and the sky is dark enough to enhance visibility. However, it’s important to keep an eye on solar activity forecasts, as the intensity of the auroras can vary based on solar winds and geomagnetic activity.

When planning your photography trip, consider the weather conditions as well. Clear skies are essential for aurora viewing, so checking local weather forecasts can help you choose the best nights. Iceland’s weather can be unpredictable, so flexibility in your schedule is key. The shoulder months of October and March are particularly advantageous, as they often feature milder weather and a mix of daylight hours, allowing for both aurora photography and exploration of Iceland’s stunning landscapes.

In addition to timing, location plays a crucial role in capturing the northern lights. Areas away from city lights, such as Thingvellir National Park, the Snaefellsnes Peninsula, and the East Fjords, offer darker skies and less light pollution, enhancing your chances of a successful shoot. It’s also beneficial to scout locations during the day to find interesting foreground elements, such as mountains, waterfalls, or unique rock formations, which can add depth and context to your aurora images.

For photography enthusiasts, having the right equipment is essential. A camera with manual settings, a sturdy tripod, and a wide-angle lens with a large aperture (f/2.8 or wider) are recommended. High ISO settings (around 3200) and longer exposure times (8-15 seconds) can help capture the vibrant colors and movement of the auroras. Practicing night photography techniques before your trip can also be beneficial, allowing you to become familiar with your camera settings in low-light conditions.

Lastly, patience and perseverance are key when photographing the aurora borealis. Sometimes, you may have to wait for hours in the cold, but the reward of witnessing and capturing this natural phenomenon is well worth the effort. Engaging with local photographers or joining guided tours can also enhance your experience, as they often have valuable insights on the best locations and times for aurora viewing.

In summary, the best time for aurora borealis photography in Iceland is from late September to early April, with optimal conditions typically found between October and March. Focus on the hours around midnight, choose dark locations away from light pollution, and ensure you have the right equipment and settings to capture this breathtaking spectacle. With a bit of luck and preparation, you can create stunning images of the northern lights that will last a lifetime.Bookmark messageCopy messageScroll to bottom

Answer-Puffins, often referred to as “clowns of the sea” due to their colorful beaks and charming demeanor, are one of Iceland’s most beloved wildlife attractions. These seabirds are primarily found along the coastal cliffs of Iceland, where they nest in large colonies. If you’re planning a trip to see puffins in Iceland, the best time to do so is from late April to early September, with peak viewing opportunities occurring between May and August.

Arrival and Nesting Season

Puffins typically return to Iceland in late April, after spending the winter months at sea. During this time, they begin to establish their nesting sites, which are usually located in burrows on steep cliffs or grassy slopes. The puffin breeding season is a critical period, as they mate and raise their chicks, known as pufflings. By May, puffins are fully engaged in nesting activities, making this month an excellent time for birdwatchers and photographers to observe their behavior.

Peak Viewing Months

The months of June and July are considered the peak season for puffin watching in Iceland. During this time, the puffins are most active, and you can witness their vibrant courtship displays, as well as the comical antics of the pufflings as they emerge from their burrows. Puffins are known for their distinctive appearance, with their black and white plumage and bright orange beaks, which are particularly striking during the breeding season. This is also when they are most visible, as they spend time foraging for fish to feed their young.

Best Locations for Puffin Watching

Several locations around Iceland are renowned for puffin watching. The Westman Islands, located off the south coast, are home to one of the largest puffin colonies in the world. Here, you can take boat tours that offer close-up views of these charming birds. Other popular spots include the cliffs of Látrabjarg in the Westfjords, Dyrhólaey near Vík, and the Snæfellsnes Peninsula. Each of these locations provides unique opportunities to observe puffins in their natural habitat, often alongside stunning coastal scenery.

Late Summer and Departure

As summer progresses into late August and early September, puffins begin to leave their nesting sites and return to the open sea. By mid-September, most puffins have departed Iceland for the winter, making this period less ideal for viewing. However, if you visit in early September, you may still catch a glimpse of puffins as they prepare to leave.

Tips for Puffin Watching

To enhance your puffin-watching experience, consider the following tips:

  1. Timing: Puffins are most active during the early morning and late evening, so plan your visits accordingly.
  2. Respect Wildlife: Maintain a safe distance from nesting sites to avoid disturbing the birds. Use binoculars or a zoom lens for closer views.
  3. Dress Appropriately: Iceland’s weather can be unpredictable, so wear layers and be prepared for wind and rain.
  4. Join Guided Tours: Many local operators offer guided tours specifically for puffin watching, providing expert insights and ensuring you reach the best viewing spots.

In conclusion, the best time to see puffins in Iceland is from late April to early September, with peak viewing from May to August. Whether you’re a birdwatcher, photographer, or simply a nature enthusiast, witnessing these delightful birds in their natural habitat is a memorable experience that adds to the allure of Iceland’s stunning landscapes.

Answer-Yes, it is absolutely possible to photograph Iceland’s landscapes in winter, and many photographers consider this season to be one of the most magical times to capture the country’s stunning natural beauty. Winter in Iceland, which typically lasts from late November to early March, transforms the landscape into a breathtaking wonderland of snow, ice, and unique light conditions. Here are several reasons why winter photography in Iceland is not only possible but also incredibly rewarding.

Unique Landscapes

During winter, Iceland’s landscapes undergo a dramatic transformation. The snow blankets the ground, creating a serene and pristine environment. Glaciers, ice caves, and frozen waterfalls become accessible, offering photographers the chance to capture stunning images of these natural wonders. Locations like Jökulsárlón Glacier Lagoon, where icebergs float in a serene blue lagoon, and the nearby Diamond Beach, where ice chunks wash ashore on black sand, provide striking contrasts that are perfect for photography.

The Northern Lights

One of the most compelling reasons to visit Iceland in winter is the opportunity to photograph the aurora borealis. The long, dark nights of winter create ideal conditions for viewing and capturing the northern lights. With the right camera settings and a bit of luck, photographers can capture the vibrant greens, purples, and pinks of the auroras dancing across the night sky. Popular locations for aurora photography include Thingvellir National Park, the Snaefellsnes Peninsula, and various spots along the south coast, away from city lights.

Unique Light Conditions

Winter in Iceland also offers unique lighting conditions that can enhance your photography. The low angle of the sun during the winter months creates soft, diffused light, which is particularly flattering for landscape photography. The golden hours—just after sunrise and just before sunset—can produce stunning colors in the sky, especially when combined with the dramatic winter scenery. Additionally, the shorter days mean that photographers can capture both sunrise and sunset in a single day, maximizing their shooting opportunities.

Challenges and Preparation

While winter photography in Iceland is rewarding, it does come with its challenges. The weather can be unpredictable, with sudden changes in conditions, including snowstorms and icy roads. It’s essential to be prepared for cold temperatures and to dress in layers to stay warm. Waterproof gear for both yourself and your camera is also advisable, as snow and moisture can be detrimental to your equipment.

Driving can be challenging in winter, so consider joining guided photography tours that specialize in winter landscapes. These tours often have experienced guides who know the best locations and can help you navigate the sometimes treacherous roads.

Safety Considerations

When photographing in winter, safety should always be a priority. Be cautious around icy surfaces, especially near waterfalls and cliffs. Always check weather and road conditions before heading out, and let someone know your plans if you’re venturing into remote areas.

Conclusion

In summary, photographing Iceland’s landscapes in winter is not only possible but also offers unique and breathtaking opportunities. From the serene beauty of snow-covered vistas to the enchanting aurora borealis, winter in Iceland is a photographer’s dream. With the right preparation, equipment, and mindset, you can capture stunning images that showcase the raw beauty of this incredible country during its most magical season. Whether you’re a seasoned photographer or an enthusiastic beginner, winter in Iceland promises unforgettable experiences and stunning photographic opportunities.

Answer-When planning a photography trip to Iceland, having the right camera gear is essential to capture the stunning landscapes, unique wildlife, and dynamic weather conditions. Here’s a comprehensive guide to the best camera gear for Iceland photography, ensuring you’re well-equipped to make the most of your adventure.

Camera Body

  1. DSLR or Mirrorless Camera: A high-quality DSLR or mirrorless camera is ideal for landscape photography. Look for a camera with a full-frame sensor for better low-light performance and dynamic range. Popular options include the Canon EOS R series, Nikon Z series, and Sony A7 series. These cameras offer excellent image quality and versatility.

Lenses

  1. Wide-Angle Lens: A wide-angle lens (16-35mm) is essential for capturing Iceland’s vast landscapes, including waterfalls, mountains, and the Northern Lights. A lens with a large aperture (f/2.8 or wider) is beneficial for low-light conditions, especially when photographing the auroras.
  2. Standard Zoom Lens: A standard zoom lens (24-70mm) provides versatility for various shooting situations, from landscapes to portraits. This lens is great for capturing details in the environment and is useful for general photography.
  3. Telephoto Lens: A telephoto lens (70-200mm or longer) is useful for wildlife photography, such as puffins and other birds, as well as for isolating distant landscapes. This lens allows you to capture details without disturbing the wildlife.

Tripod

  1. Sturdy Tripod: A sturdy tripod is crucial for landscape photography, especially in low-light conditions or when using long exposure techniques. Look for a lightweight, portable tripod that can withstand windy conditions, as Iceland’s weather can be unpredictable.

Filters

  1. ND Filters: Neutral density (ND) filters are essential for long exposure photography, allowing you to capture smooth waterfalls and the movement of clouds. A 6-stop or 10-stop ND filter is ideal for achieving the desired effect.
  2. Polarizing Filter: A polarizing filter can enhance colors, reduce glare, and improve contrast in your images, especially when photographing water and skies. This filter is particularly useful for capturing the vibrant blues of glacial lagoons and the rich greens of moss-covered landscapes.

Accessories

  1. Extra Batteries: Cold weather can drain batteries quickly, so bring several fully charged spare batteries. Consider using battery warmers or keeping them close to your body to prolong their life.
  2. Memory Cards: Bring multiple high-capacity memory cards to ensure you have enough storage for your images. It’s wise to have backups in case of card failure.
  3. Weather Protection: Iceland’s weather can be unpredictable, so invest in weather-sealed gear or protective covers for your camera and lenses. A rain cover or a simple plastic bag can protect your equipment from rain and snow.
  4. Lens Cleaning Kit: Dust, moisture, and salt spray can affect your lenses. A lens cleaning kit with a microfiber cloth, blower, and cleaning solution will help keep your gear in top condition.

Conclusion

In summary, the best camera gear for Iceland photography includes a high-quality DSLR or mirrorless camera, a selection of lenses (wide-angle, standard zoom, and telephoto), a sturdy tripod, and essential filters. Additionally, don’t forget extra batteries, memory cards, weather protection, and a lens cleaning kit. With the right gear, you’ll be well-prepared to capture the breathtaking landscapes, unique wildlife, and dynamic weather that make Iceland a photographer’s paradise. Whether you’re shooting the Northern Lights, dramatic waterfalls, or rugged coastlines, having the right equipment will help you create stunning images that reflect the beauty of this incredible country.Bookmark messageCopy message

Answer-To prepare for Iceland’s unpredictable weather, it’s essential to dress in layers, starting with thermal underwear and adding waterproof outer layers like jackets and pants. Always carry weatherproof gear, including sturdy footwear, and be ready for sudden changes, such as rain, wind, or snow. ### Stay Informed

  • Weather Forecasts: Regularly check reliable weather sources such as the Icelandic Meteorological Office (IMO) for up-to-date forecasts. Websites like vedur.is provide detailed information on wind speed, precipitation, and temperature, which are crucial for planning your activities.
  • Local Alerts: Utilize platforms like SafeTravel.is for alerts on severe weather conditions and trail safety. This site is particularly useful for hikers and travelers in remote areas.

Dress Appropriately

  • Layering System: Use a three-layer system to adapt to changing conditions:
    • Base Layer: Start with moisture-wicking thermal underwear to keep sweat away from your skin.
    • Insulating Layer: Add a fleece or down jacket for warmth.
    • Outer Layer: Finish with a waterproof and windproof jacket and pants to protect against rain and wind.
  • Footwear: Invest in high-quality, waterproof hiking boots with good ankle support. Ensure they are well broken in to avoid blisters during your hikes.

Emergency Preparedness

  • Emergency Plan: Before heading out, inform someone about your hiking plans, including your route and expected return time. This is crucial for safety in case of emergencies.
  • First Aid Kit: Carry a well-stocked first aid kit to address minor injuries. Include items like bandages, antiseptic wipes, and pain relievers.
  • Navigation Tools: Always have a physical map and compass, even if you’re using a GPS device. GPS can fail, and having a backup is essential for navigation in remote areas.

Gear for Changing Conditions

  • Waterproof Gear: Always have a high-quality waterproof jacket and pants. Waterproof gloves and gaiters can also help keep you dry and warm.
  • Wind Protection: Strong winds are common in Iceland, especially in open areas. A windproof outer layer, along with a hat and gloves, can help prevent wind chill.
  • Emergency Shelter: Consider carrying a lightweight emergency shelter or a thermal foil blanket to protect yourself from the elements if you get caught in bad weather.

Adapt to Seasonal Changes

  • Spring and Autumn: Be prepared for mixed conditions, including rain and snow. Trails may be muddy or covered in snow, so adjust your plans accordingly.
  • Winter Hiking: Only experienced hikers should attempt winter hikes. Ensure you have specialized gear like crampons and ice axes, and be aware of the limited daylight hours.
  • Summer Conditions: While summer offers the best hiking conditions, be ready for sudden weather changes. Always check forecasts before heading out.

Stay Flexible

  • Alter Plans: If the weather forecast indicates severe conditions, be prepared to change your plans. Flexibility is key to ensuring safety during your adventures.
  • Know When to Turn Back: If conditions worsen while you’re out, prioritize safety over completing your hike. It’s better to turn back than risk getting caught in dangerous weather.

Conclusion

Preparing for Iceland’s unpredictable weather involves a combination of proper clothing, emergency preparedness, and staying informed. By layering your clothing, carrying essential gear, and being flexible with your plans, you can safely enjoy the stunning landscapes and unique experiences that Iceland has to offer. Always prioritize safety and be ready to adapt to the ever-changing conditions of this beautiful country.Bookmark messageCopy message